Can a UV Printer Print on Leather Jackets? A Vendor’s No-Nonsense Guide UV Printer
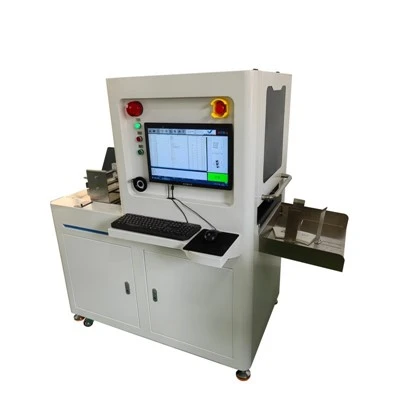
If you’ve ever walked past a streetwear pop-up or flipped through a high-fashion lookbook and spotted a leather jacket with a crisp, full-color graphic that never fades, peels, or cracks, chances are it was made with a UV printer. As someone who’s spent the last 12 years selling, maintaining, and troubleshooting UV printers for apparel and leather goods businesses, I get this question all the time: Can a UV printer actually print on leather jackets?
The short answer is yes—but it’s not as simple as loading a hide into a machine and hitting print. There’s a lot of science, prep, and machine-specific know-how that goes into making a print that looks good, feels right, and stands up to years of wear. Let me break this down like I do for every customer who walks into my workshop, from small custom leather crafters to mid-sized apparel brands.
First, let’s get clear on what a UV printer is and why it works for leather. UV stands for ultraviolet, and these printers use curable inks that dry almost instantly when hit with a UV light as soon as they’re deposited on a surface. Unlike screen printing, which requires mixing and stripping screens, or solvent-based inks that take days to cure and smell like chemicals for weeks, UV inks adhere to porous, flexible surfaces like leather without seeping deep into the hide. That’s a huge win for leather jackets—you don’t want your print to stiffen, crack, or feel like a plastic patch every time the leather bends when someone reaches for their keys or slides into a car.
But not all leather is the same, and that’s where most new users mess up. There’s full-grain leather, top-grain, split-grain, and even faux leather (PU leather) that’s common in affordable jackets. Each has a different texture, porosity, and surface coating, which directly affects how the ink sticks. For example, full-grain leather is the most porous—its natural, unprocessed surface has small fibers that grab ink, but it can also absorb too much ink if you don’t prep it right. Faux leather, on the other hand, is usually coated with a synthetic polymer that’s super smooth and non-porous, so ink can slide right off if you skip the adhesion step.
I once had a customer who ran a small custom jacket shop buy a entry-level UV printer, load a bunch of cheap split-grain leather jackets, and print a 10-inch logo on each. A week later, half the jackets came back with the logo peeling off in chunks. He blamed the printer, not the leather. When he brought a sample to my workshop, I tested it: the split-grain had a thin, synthetic finish over the hide, so the UV ink couldn’t bond. The fix was simple—we ran a light adhesive primer over the print area, let it cure for 30 seconds, then printed. No peeling after three months of wear testing. That’s the kind of mistake anyone can make if they don’t understand the basics.
Next, the prep process for leather jackets is non-negotiable, but it’s not complicated. Let’s walk through it step by step, like we do in our training sessions:
-
Surface Cleaning: Leather has natural oils, dirt, and conditioner buildup that can prevent ink from sticking. Even new leather jackets have a factory coating that needs to be removed. We use a isopropyl alcohol solution (70% concentration works best) and a lint-free cloth to wipe down the entire print area, then let it dry for 10 minutes. For tough stains, a mild, leather-safe cleaner works, but never use anything with silicone—it leaves a residue that repels ink.
-
Primer Application: This is the make-or-break step for most leather types. Adhesion primers for UV printers are specially formulated for flexible surfaces. For porous leather, the primer fills in small gaps in the hide to create a smooth base for ink. For non-porous faux leather, the primer etches a tiny layer on the surface so ink can grab onto it. I always tell customers to test the primer on a scrap piece of the same leather first—what works for cowhide might not work for lambskin.
-
Test Prints: Before loading a full jacket, run a test on a small scrap of leather. Check for two things: adhesion (rub the test area with a cotton ball soaked in alcohol—if ink comes off, adjust primer or print settings) and flexibility (bend the scrap back and forth a dozen times—if cracks form, your ink is too thick or the UV cure time is too short).
Now, let’s talk about printer settings, because that’s another area where people go wrong. UV printers for leather jackets aren’t the same as the flatbed printers you use for mugs or phone cases. Leather is a flexible, slightly uneven surface, so you can’t set it and forget it.
First, the print head height. If the print head is too close to the leather, it might press into the hide, leaving indentations, or cause ink to pool. If it’s too far away, ink droplets spread, leading to blurry images. For most leather types, we set the print head 1.5 to 2 millimeters above the surface. Your printer’s manual will give a range, but test it on a scrap until the print is crisp.
Then, UV cure intensity. A common mistake is using too little UV light, which leaves ink soft and prone to smudging, or too much, which makes the ink hard and brittle. For leather, we use medium intensity—high enough to cure the ink instantly, but not so high that it damages the leather’s natural oils or makes the print crack. We also adjust the number of print passes: one pass for light, solid colors, three to five passes for dark, opaque graphics. Too many passes add too much ink, which can make the print feel stiff.
What about different leather types and what works best? Let’s get specific, because that’s what customers actually care about:
-
Full-Grain Leather: The best of the best for UV printing. It’s durable, breathable, and has a natural texture that adds depth to prints. You can print full-color photos, intricate line art, even gradient designs, and the ink will flex with the leather. The only downside? It’s more expensive than other leathers, and its natural color can show through light inks. For example, a light gray print on dark brown full-grain leather will look slightly off, so you’ll need to print a white underbase first (another common step! White ink acts as a background for light colors, so they pop against dark leather).
-
Top-Grain Leather: Slightly processed, so it’s more uniform than full-grain, but still has some texture. It works great for logos, bold graphics, and solid colors. It’s less porous than full-grain, so you might need a bit more primer, but it’s cheaper and easier to work with.
-
Faux Leather (PU Leather): Super popular for affordable jackets, especially fast fashion brands. It’s smooth, uniform, and comes in all colors, but it’s non-porous, so adhesion is tricky. If you’re printing on faux leather, skip the regular primer and use a synthetic adhesion primer, and run a few extra print passes to build the ink’s grip. Prints on faux leather are just as durable as real leather, as long as you do the prep right.
-
Split-Grain Leather: The bottom layer of a hide, usually coated with a synthetic finish. It’s the least expensive, but also the most finicky. Most of the time, it peels if you don’t use the right primer and print settings. I don’t recommend split-grain for high-quality products, but if you’re making budget custom jackets, just test multiple primers until you find one that works.
Now, let’s address the biggest myths I hear from new users:
Myth 1: UV prints on leather are waterproof. Sort of. The ink itself is water-resistant, which means it won’t smudge if you spill a coffee on your jacket. But leather is porous, so if water seeps into the hide, it can cause the leather to warp or stain. To make the print area fully waterproof, we add a clear top coat after printing, which adds a thin, flexible layer over the ink. That’s optional, but it’s a great add-on for jackets that get heavy use.
Myth 2: You can print any design at any size on any leather. Wrong. Intricate line art or tiny text is hard to print on textured leather, because the texture can obscure fine details. For example, a 5mm wide text logo will look blurry on rough full-grain leather, but crisp on smooth top-grain or faux leather. Stick to designs that match the leather’s texture, and always test small details first.
Myth 3: UV printers are too expensive for small businesses. A lot of small custom crafters hold back because they think UV printers only cost tens of thousands of dollars. But that’s not true for entry-level models designed for apparel and small leather goods. Our entry-level UV flatbed printers (specifically the ones built for flexible surfaces) start at around $8,000, which is less than the cost of 100 screen printing setups for a small shop. Plus, you can print on demand, so you don’t have to stock inventory—print one jacket at a time, no minimums. That’s a game-changer for small businesses that can’t afford large orders.
I’ve seen this technology turn small custom jacket shops into regional brands, and help mid-sized apparel lines cut their production time in half. Before UV printers, printing a custom leather jacket would take 10 to 14 days: make the jacket, cut screens, print, cure, and finish. Now, a single custom jacket takes less than an hour, from design to finished product.
But here’s the thing: it’s not the printer that makes the great print—it’s the knowledge behind it. I’ve seen customers buy the same brand and model of printer, and one makes perfect prints every time, while the other has half their orders come back with peeling or cracking. The difference? The first customer took our training, tested their leather, and adjusted their settings, while the second just plugged it in and printed.
If you’re considering adding UV printing to your leather jacket business, here’s my advice: first, test. Buy a small number of leather scraps and a can of primer, run test prints, see how different designs and settings work. Second, invest in training. A good supplier will teach you not just how to run the printer, but how to prep leather, adjust for different materials, and troubleshoot common issues. Third, start small. Don’t buy a huge industrial printer until you have a steady order flow—entry-level models work perfectly for small batches and on-demand printing.
At the end of the day, a UV printer can absolutely print on leather jackets, and create results that hold up better than almost any other printing method. The key is understanding the material, the prep process, and the printer’s settings. It’s not rocket science, but it’s not a plug-and-play tool either. That’s why so many successful apparel and custom leather businesses rely on UV printing—it’s flexible, fast, and produces results that customers love.
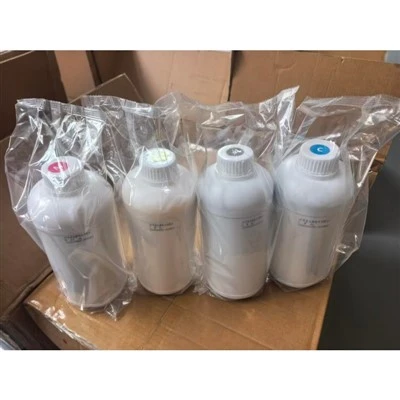
If you’re ready to learn more about which UV printer is right for your leather jacket line, or want to ask specific questions about prep, settings, or testing, we’re here to help. We work with businesses of all sizes, from one-person custom shops to large fashion brands, and we’re happy to walk you through every step.
Flexible Uv Ink References
- International Journal of Clothing Science and Technology. "Adhesion of UV-Curable Inks to Flexible Leather Substrates", 2019.
- Leather Industries of America. "Surface Preparation and Coating for Digital Printing on Leather", 2021.
- UV Tech Journal. "Curing Parameters for Flexible Substrate Printing with UV Inks", 2020.
- Apparel Manufacturing Association. "On-Demand Digital Printing for Small Batch Apparel Production", 2022.
Shenzhen ZYH Digital Technology Co., Ltd.
As one of the most professional uv printer manufacturers and suppliers in China, we have world-leading production equipment and strong manufacturing capabilities. Please feel free to wholesale durable uv printer at competitive price from our factory.
Address: Niuzai Park, Xinlian Community, Longcheng Street, Longgang District, Shenzhen City, China.
E-mail: sheena@zyh-group.com
WebSite: https://www.uvprinter-zyh.com/
