If you’ve ever worked with PET resin in an injection molding machine, you’ve probably spent more time than you’d like troubleshooting melt-related issues: parts that are streaky, not fully formed, or weakened by overheating. As a PET injection molding machine supplier, I talk to dozens of molders every week who assume “higher heat equals better flow” or that all PET grades melt at the same temperature. That’s the kind of misstep that leads to wasted resin, down time, and parts that don’t meet specs. Today, let’s break down what the ideal melting temperature for PET actually is, why it’s not a one-size-fits-all number, and how getting it right makes all the difference. PET Injection Molding Machine

First, let’s ground this in what PET is, chemically. PET—polyethylene terephthalate—is a thermoplastic polyester, which means it softens when heated and hardens when cooled, making it perfect for everything from water bottles to packaging trays to small consumer parts. But unlike simpler thermoplastics, PET has a unique quirk: it’s hygroscopic. That means it absorbs moisture from the air, sometimes to the tune of 0.02 to 0.1% moisture content, even if it’s sitting in a sealed bag on your shop floor. That moisture is the enemy here, because if you heat PET without drying it first, it will undergo hydrolysis as it melts. Hydrolysis breaks the polymer chains, lowers the molecular weight, and results in parts that are brittle, cloudy, or prone to cracking at the gates.
So before we even get to melt temperature, I need to stress this: drying is non-negotiable. Most quality PET resin specs require moisture content below 0.005% before molding, and that means running it in a desiccant dryer at 150 to 170°F (65 to 75°C) for 4 to 6 hours, depending on resin grade and hopper size. Skip that step, and no matter how precise your melt temperature is, you’re going to have bad parts. Now, with dry PET in the hopper, let’s talk about what happens inside the barrel of an injection molding machine.
PET doesn’t have a sharp melting point, like ice turning to water at 32°F. Instead, it has a glass transition temperature (Tg) around 150°F (65°C) for amorphous PET, and a melting temperature range (Tm) that typically falls between 480 and 550°F (250 and 288°C). Wait, that’s a range—why the spread? Because the exact melting point depends on the PET grade. Let’s break down the common grades molders work with.
For general-purpose PET, the kind used in bottles, trays, and thin-walled packaging, the ideal melt temperature range is 500 to 530°F (260 to 277°C). This is the sweet spot for most small to medium runs. If you stay below 500°F, your PET won’t fully melt, leading to high viscosity, slow flow, and parts that have incomplete fill—especially for intricate molds or thin walls. Push it above 530°F, and two problems start to pop up. First, you risk thermal degradation: PET starts to break down chemically at temperatures above 550°F (288°C), even for short periods of time. Degradation manifests as yellowing in the part, increased brittleness, and even gas buildup that causes bubbles or splay marks on the surface. Second, too high a melt temperature can cause excessive shrinkage as the part cools, leading to warped dimensions or parts that don’t fit into assemblies.
But not all PET is general-purpose. Let’s talk about engineering-grade PET, the kind used for structural parts like automotive components, electrical connectors, or appliance housings. This PET has additives—glass fiber, impact modifiers, flame retardants—to boost strength and durability. For glass-filled PET grades, the ideal melt temperature is a bit higher, usually 520 to 550°F (271 to 288°C). Why? The glass fibers add structural rigidity, so the resin needs a little extra heat to flow properly around the fibers and evenly distribute them throughout the melt. If you keep glass-filled PET at the general-purpose range, the viscosity is too high, leading to inconsistent fiber dispersion, weak parts, and surface blemishes like knit lines that are visible or prone to breaking.
There’s another edge case: ultra-high-flow PET, which is designed for very thin-walled parts, like disposable food containers or pharmaceutical blister packs. These grades have lower molecular weight, so they flow easier, and their ideal melt temperature is slightly lower, around 490 to 510°F (254 to 266°C). Cranking the heat here is a mistake—low molecular weight PET degrades much faster than standard grade, so even a few degrees over 510°F can ruin the resin’s strength and clarity.
Now, it’s not just the set barrel temperature that matters. A lot of molders only adjust the barrel zones (the heat zones along the length of the screw) and forget that the shear from the screw turning also generates heat inside the melt. Shear heat is the friction between the molten resin and the barrel, and between the resin molecules themselves. For high-speed injection molding, where the screw turns fast and the melt is pushed through the nozzle at high pressure, shear heat can add 30 to 50°F (15 to 25°C) to the actual melt temperature. That means if you set your barrel zones to hit 520°F, the melt might actually be 550°F before it even hits the mold—way over the ideal range for general-purpose PET.
That’s a mistake I see all the time. Melt temperature is not the same as barrel set temperature. The only way to get an accurate reading is to use a melt temperature probe inserted into the nozzle or the center of the shot, not just rely on the machine’s zone displays. I recommend that every molder I work with invest in a portable melt thermometer and check the actual temperature at least once per run, more often if you’re changing resin grades or running different part sizes.
Let’s talk about what happens when you get the temperature wrong on both ends. Too cold: I had a customer last year molding small PET coffee lids who set their barrel zones at 480°F to save energy. Their lids were coming out with half the surface looking dull and streaky, and 1 in 10 wouldn’t snap onto a standard coffee cup. We checked the actual melt temperature and it was only 465°F—way below the melting range. Raising the barrel zones to 510°F adjusted for shear heat, brought the actual melt temp to 525°F, and their defect rate dropped from 12% to less than 1% overnight.
Too hot: Another customer molding automotive PET connectors was running at 560°F barrel temperature, trying to get better flow for their intricate mold. Their parts were coming out yellow, and when they did a tensile test, they had 25% less strength than the spec required. We tested the melt temperature and it was 575°F—definitely in the degradation zone. Lowering the barrel zones to 530°F, plus increasing cooling time in the mold, brought the melt temp down to 540°F, their color and strength specs were back on track, and they even reduced cycle time because the parts cooled faster.
There are also factors that affect how you adjust temperature depending on your machine and mold design. If you’re running a large part with thick walls, you might need a slightly lower melt temperature to reduce shrinkage as the center cools. If you have a complex mold with many small gates, you might need a touch higher melt temperature to ensure all the gates fill evenly. And if you’re using a hot runner mold, where the melt stays heated in the channels between shots, you’ll want to be 10 to 20°F lower on your melt temperature to avoid degradation while the melt sits in the hot runner.
Wait, one more myth to bust: some people think that using a higher melt temperature will fill the mold faster, reducing cycle time. That’s not true. Higher viscosity from too-cold melt flows slower, even if you push it with pressure. The ideal melt temperature gives you the right viscosity to flow evenly through the mold without excess heat, so you can maintain consistent fill times and cycle lengths. In fact, the customer running lids was able to cut their cycle time by 2 seconds once they got the temperature right, because the parts filled evenly and cooled more uniformly.
Now, let’s get practical. If you’re just setting up a new PET molding run, here’s a step-by-step guide I give every new customer: 1) Dry your resin properly to below 0.005% moisture content. 2) Start with barrel zone temperatures: feed zone at 400°F (204°C), transition zone at 500°F (260°C), nozzle zone at 520°F (271°C). This is a baseline for general-purpose PET. 3) Adjust based on melt temperature: use your probe to check actual melt temp. If it’s below 500°F, raise the nozzle zone by 10°F at a time. If it’s above 540°F, lower by 10°F. 4) Adjust for shear: if you’re running high injection speed, lower the barrel set temp by 10°F to account for extra shear heat. 5) Test parts: check for incomplete fill, streaks, yellowing, brittleness, and dimensional accuracy. Tweak from there, and you’ll hit the sweet spot in a couple of runs.
As a PET injection molding machine supplier, one of the most common questions I get is “what’s the one temperature I should set?” And that’s why I wrote this post: there is no single number, but there is a range that works for 90% of applications, and adjusting for resin grade, part design, and machine conditions is key. If you’re still guessing at your melt temperature, or if you’re dealing with persistent defects that you can’t pin down, it’s worth taking the time to test and adjust—you’ll save way more in reduced scrap and faster runs than you’ll spend on a melt thermometer and a few test shots.
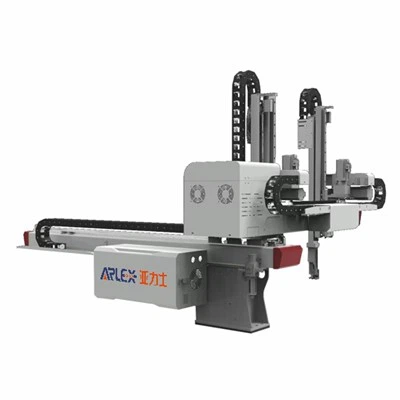
If you’re in the market for a PET injection molding machine that’s built with precise temperature control (one of the most important features for consistent PET molding) or you need help troubleshooting your current process, reach out. I’ve worked with hundreds of molders, from small job shops to large consumer goods manufacturers, to dial in their PET melt profiles and cut defect rates. A little time getting the temperature right will make a huge difference in your parts’ quality and your bottom line.
References
Plastic Injection Moulding Machine Rosato, D. V., & Rosato, M. G. (2000). Injection Molding Handbook (3rd ed.). Kluwer Academic Publishers.
Speidel, M. O. (1998). Moisture Absorption and Hydrolysis of Polyesters. Journal of Applied Polymer Science.
ASTM D3951-21, Standard Practice for Commercial Packaging of Petroleum Products and Lubricants.
Pet Resin Industry Technical Data. (2022). PET Processing Guidelines for Injection Molding. Society of the Plastics Industry.
Ningbo Yalishi (Arlex) Plastic Machinery Co., Ltd.
Address: No.63, Huangsu East Road, Industrial Zone, Dongqian Lake Tourist Resort, Ningbo, Zhejiang Province
E-mail: leo@arlex.cn
WebSite: https://www.arleximm.com/
